Showing posts with label Recipes - All. Show all posts

Thursday, July 28, 2016

Peanut Butter Banana Toast

Today's post is a simple one.  :)  This is as quick and easy snack I came across not too long ago...and it's delicious!!

Peanut Butter Banana Toast

Serves: 1

Ingredients:
  • Approx. Container Equivalents: 1 Yellow, 1 Purple, 3 Black
    1 slice whole grain bread
  • 1/2 medium banana, sliced
  • 3 tsp all-natural peanut butter

Directions:
  1. Toast bread to your liking.
  2. Spread peanut butter on toast immediately.
  3. Layer sliced bananas across peanut butter on top of toast.
  4. Eat while toast is nice and hot!
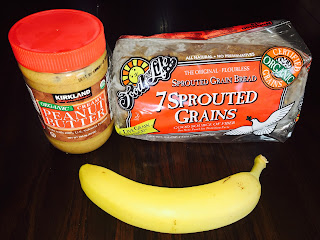
Here's my favorite ingredients to use in making this:


Some people I know like to drizzle a teaspoon of honey on top.  I hear this is also good with strawberries instead of bananas!

Enjoy!!

 Deise

Monday, July 25, 2016

Blueberry Banana Muffins

There was a time when I wasn't much of a breakfast person.  When I did eat breakfast, though, one of my favorite things to make was a bag of those pre-packaged blueberry muffins.

The smell of blueberry muffins baking in the oven and the anticipation of eating them hot from  the oven and dripping with butter was almost more than I could handle!!

Yes, this was before my clean eating days.  ;)

After I got into clean eating, I didn't feel the bag of pre-packaged blueberry muffins was worth it...one look at the list of ingredients was enough to make them less appetizing and not nearly as enjoyable.  (Some not-so-clean foods are worth it for a treat meal...after all, I don't eat 100% clean!  Pre-packaged blueberry muffins are just not one of those foods for me.)

Still, there were times when I found myself craving blueberry muffins.

And so, I attempted to make a clean blueberry muffin recipe.

As I mixed the batter and filled the muffin cups, I felt the excitement building with me.  As they baked, that fabulous blueberry muffin smell filled the kitchen, and when those muffins came out of the oven, they looked divine!!

I couldn't wait to eat them.

I chose the most delicious looking muffin (of course!), put a little butter on top and in the middle, waited a few seconds for the butter to melt, and then sunk my teeth into the muffin, expecting a perfect ending to my story.

So...you can imagine my disappointment when they tasted...BLAH.

In fact, the taste was so lacking that I couldn't bring myself to eat anymore of them.  Ha ha!

After that experience, I was quite a bit more hesitant to make homemade clean muffins (or homemade clean breads of any kind, for that matter, as I've had similar fails with bread), mostly because I seem to be super picky with this and there is nothing I hate more than wasting food!

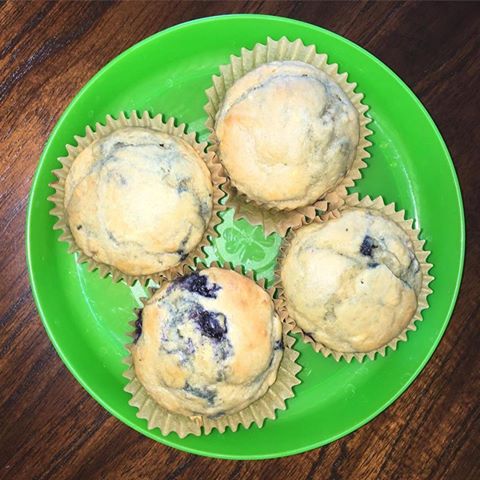
But, when a friend of mine shared a picture of mini blueberry muffins she made, the craving returned full throttle and I decided to give it another whirl.

Photo Credit: Kelli Anderson
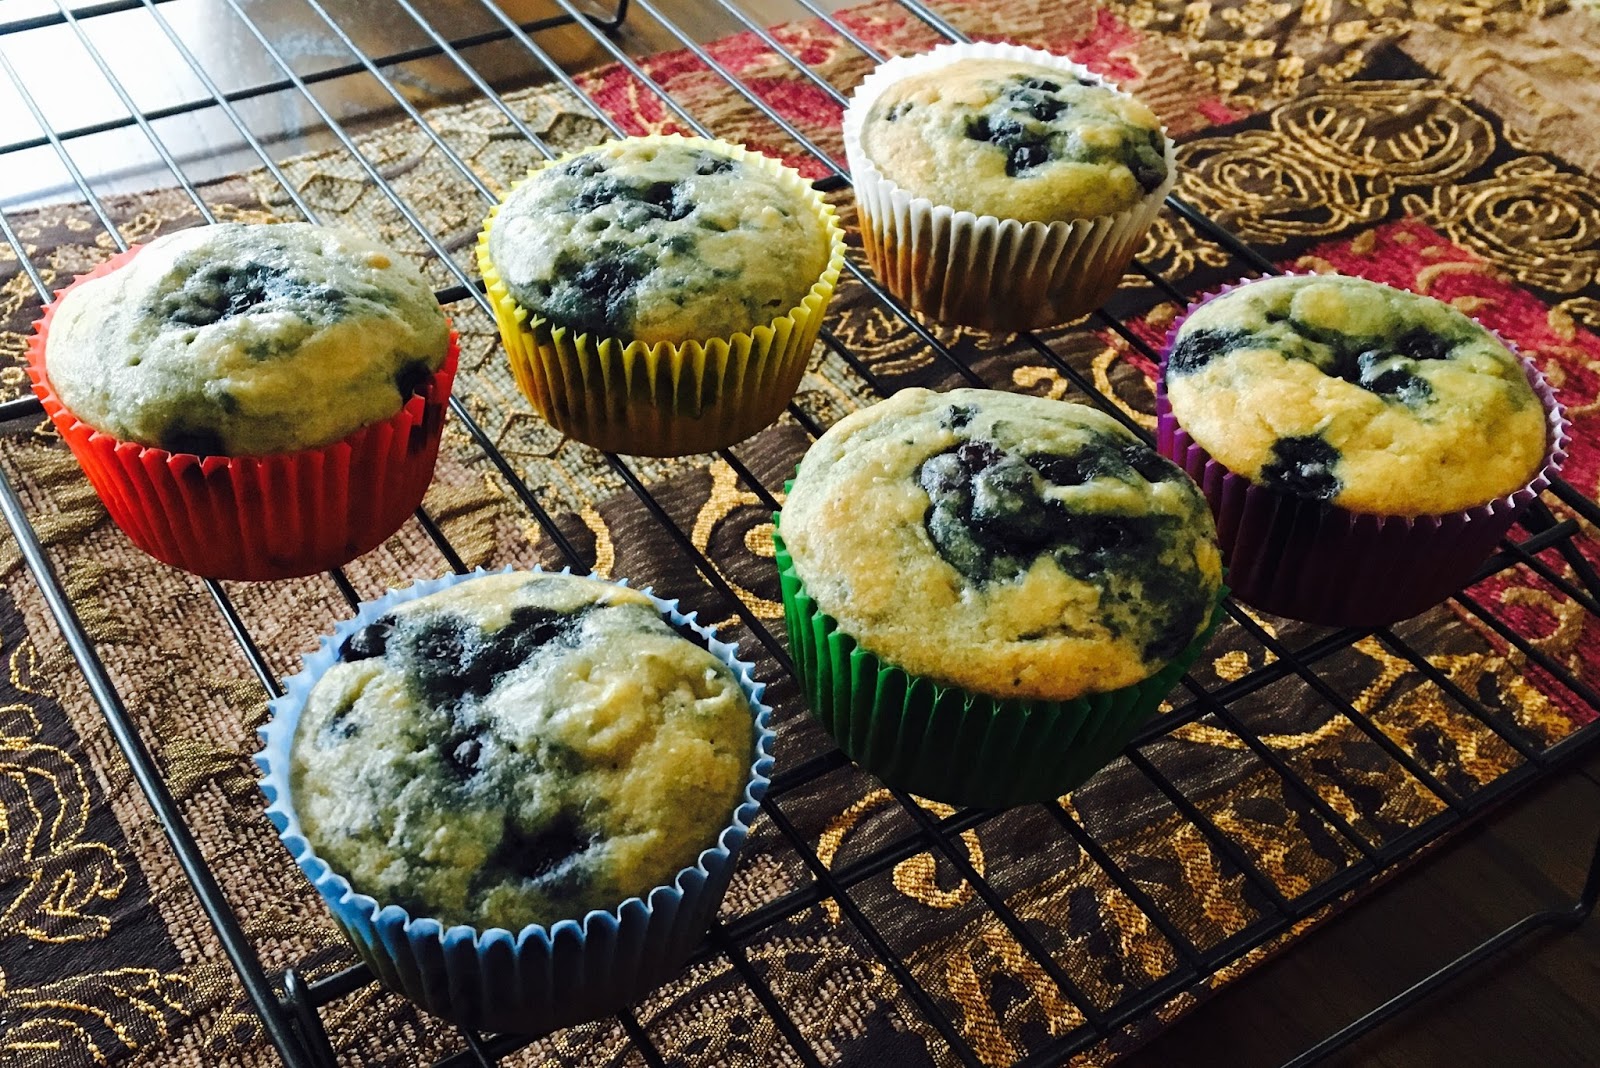
Good news...these muffins were absolutely worth it!!  My recipe is a cleaned-up version of the muffin recipe found here; I haven't tried the original recipe.  I love the cleaned-up version.  ;)

Today was the third time we've made these muffins.  My little man was my kitchen helper; I love doing things like this with him.  He pulled his little chair up to the counter so he could stand on it to help measure out ingredients and dump them into the various bowls.


He also picked which baking cups we used (the colorful ones!) and put them in the muffin tin for me.  He is my mini chef and an awesome little helper!


Everyone in my family loves these!  My hubby says they taste just like banana bread and my toddler asks for "more muffins!"  We have to restrain ourselves to keep from eating the entire pan!! ;)


I hope you and yours enjoy them just as much as we do!

Blueberry Banana Muffins

Makes: 12 Regular Muffins or 24 Mini Muffins
Serving Size: 1 Regular Muffin or 2 Mini Muffins
Calories: 1 Regular Muffin = 129 Calories (per My Fitness Pal)

Ingredients:
  • Approx. Container Equivalents: 1 Regular Muffin = 1 1/2 Yellow
    1 cup white whole wheat flour
  • 1 tsp aluminum free baking powder
  • 1/2 tsp baking soda
  • 1/4 tsp fine sea salt
  • 2/3 cup milk
  • 2 tsp white vinegar
  • 1 egg
  • 1 1/2 Tbsp honey (30 grams)
  • 2 Tbsp 100% pure maple syrup
  • 2 Tbsp melted extra virgin coconut oil
  • 1/2 cup blueberries
  • 1 ripe banana, smashed
  • Butter (optional)

Directions:
  1. Generously grease muffin pan (12-cup regular or 24-cup mini) with non-stick spray.  Alternatively, use baking cups.  Preheat oven to 350 degrees.
  2. In a small bowl, combine milk and vinegar.  Set aside; let mixture stand at room temperature for 5-10 minutes.  When the mixture is ready, the milk will be slightly thickened and you will see small curdled bits.
  3. In a medium bowl, combine flour, baking powder, baking soda, and salt.  Sift together with a wire whisk.
  4. In another bowl, combine egg, honey, and maple syrup; whisk to blend.  Then add in milk mixture and melted coconut oil; whisk to blend.
  5. Add wet ingredients to dry ingredients and stir with a spoon until combined.  
  6. Stir in smashed banana and then gently fold in blueberries.
  7. Divide batter among muffin cups.  Sprinkle a few blueberries on top of each muffin.
  8. Bake mini muffins for 8-9 minutes and regular muffins for 13-15 minutes, or until golden brown and toothpick inserted into the center comes out clean. 
  9. Let cool slightly and then remove from pan.  If baking cups were not used, you may need to use a toothpick around the edges to separate the muffins from the pan.
  10. Serve immediately.  Top with warmed butter, if desired.  These muffins are also great as leftovers with no added butter.

If you are a blueberry muffin lover like us, looking for a healthier option, try these!  And comment below to let us know what you think!

You may find it hard to limit yourself to just 1 or 2!  ;)

Enjoy!!

 Deise

Monday, May 23, 2016

Cheesy Chicken & Rice

We got back from vacation this morning!!

I was excited for vacation and the opportunity to be a good example of how to eat healthy and exercise while traveling...

Ha!

Ya, that didn't happen.

I didn't workout even one time and my diet was awful.

But, we had fun!!

And now, I am SO ready to get back on the healthy living train.  I have a fitness group starting today and I couldn't be more excited!!  I think I'm going to start PiYo on Wednesday.

But I digress...

One thing that we always look forward to after getting back from vacation is having a healthy, home cooked meal for dinner!

It just feels and tastes SO good.

Tonight, I modified a recipe from one of my upline coaches.  I'm calling it Cheesy Chicken & Rice.

My toddler hasn't had a chance to try it yet, but my hubby was a fan! 

Cheesy Chicken & Rice

Makes: ~5-6 cups
Serving Size: ~1 1/2 cups

Approx. Container Equivalents: 1 Yellow, 1 Red, 1/2 Green, 1 Blue
Ingredients:
  • 1 Tbsp butter
  • 1/2 medium yellow onion, chopped
  • 1 cup organic baby carrots, chopped
  • 1 can (14.5-oz) low-sodium chicken broth
  • 2 pouches Seeds of Change Organic Rice and Quinoa
  • 2 cups pre-cooked chicken, diced
  • Cheddar cheese, finely shredded

Directions:
  1. Saute onion and carrots in butter until carrots are "semi-soft."
  2. Add in broth, rice/quinoa, and chicken.
  3. Simmer 5-7 minutes on medium heat.
  4. Serve immediately.  Top individual servings with finely shredded cheddar cheese.
This recipe is not quite clean, as I don't think the Seeds of Change Organic Rice and Quinoa is perfectly clean...but it is a much better option for a quick dinner than most other packaged rice options you will find in the store!  If you already have the chicken cooked and diced, this is a SUPER fast recipe to make.

If you'd like an even cleaner version of this recipe, you could cook brown rice and/or Quinoa yourself from scratch and use that instead of the Seeds of Change Organic Rice and Quinoa.  You'd need about 4 cups total cooked.

Enjoy!!

 Deise

Thursday, May 12, 2016

Banana Oat Pancakes

I've been getting more adventurous with breakfast recipes this week because my normal go-to breakfasts haven't been sounding that great to me.

Has that every happened to you?!

Normally I have something with eggs for breakfast because I like to include protein if possible...but I've been having a hard time with protein in general lately.

Ever since I started making new things for breakfast, my little guy makes breakfast requests.  

It's pretty adorable.

It used to be that I just made whatever I felt like and he ate it, too.  

Now, he is vocalizing his own preferences, and I just love that.

Today, he asked for pancakes!

I made these Banana Oat Pancakes a few days ago, and my little man LOVED them!  He ate more than I did, which was crazy!

Apparently he remembered how much he liked them.  ;)

This recipe is from the FIXATE Cookbook.  It is SO easy to make, and tasty, too!  

My little guy will eat these pancakes plain.  Personally, I like to dip mine in a little bit of pure maple syrup (about 1 tsp per pancake).  And of course, breakfast is never complete without a side of fruit!!  ;)

How do you like to eat your pancakes?!

Banana Oat Pancakes

Makes: ~8 pancakes
Serving Size: 2 pancakes

Ingredients:
Container Equivalents: 1 Yellow, 1/2 Purple
  • 1 cup unsweetened almond milk
  • 2 large eggs
  • 1 large ripe banana
  • 1 tsp pure vanilla extract
  • 1 tsp baking powder (aluminum free)
  • 1/2 tsp ground cinnamon
  • 1 dash sea salt (or Himalayan salt)
  • 2 cups old-fashioned rolled oats
  • 1/2 tsp organic coconut oil
  • 3 cups fresh mixed berries

Directions:
  1. Place almond milk, eggs, banana, extract, baking powder, cinnamon, salt, and oats in blender; cover.  Blend until smooth.
  2. Heat oil in nonstick skillet over medium-low heat.
  3. Pour 1/4 cup batter into the skillet; cook for 2 to 3 minutes, or until bubbles from around the edges of the pancake.  Flip with spatula; cool for an additional 90 seconds.
  4. Continue with remaining batter.
  5. Serve with fresh berries.

The best part about this breakfast was having my little guy help me mix up the batter!  I love that he's getting big enough to "help" with cooking.  Those are some of the fondest memories I have with my mom.

Do you have any kids who who like to help you cook?!

What sorts of things do you do to involve your kids in the kitchen?

I would love to hear - you know I'm always looking for new ideas!

 Deise

Monday, November 16, 2015

Vegetable Egg Cups

As part of the free clean eating and exercise challenge group I am doing this week, I decided to include some new recipes from the FIXATE Cookbook in my meal plan for the week.  There are SO many quick and healthy recipes in the FIXATE Cookbook that I've been wanting to try, and my challenge group this week was JUST the excuse I needed to make it happen!  :)

Today marks day 1 of my clean eating and exercise challenge.  This morning for breakfast, I made Vegetable Egg Cups for the first time and found a new favorite breakfast to add to my meal rotation!!  This was such a quick and delicious breakfast recipe - seriously so easy to make!  And kid friendly!  My toddler ate as many I did (2 egg cups each) and even wanted more!  Of course, there weren't any more since I only made as many as I thought we would eat - I didn't want there to be any leftovers if we didn't like it.  Ha!  Can anyone else relate to that?!?

Now that I know we like Vegetable Egg Cups, I can make extra next time!!  These would make a great grab-and-go breakfast, and extra egg cups could be stored in the fridge (or freezer) and then reheated in the microwave.  They are also really versatile - I'm excited to experiment with different veggie combinations the next time I make this!!

Today, I made a total of four Vegetable Egg Cups, including (1) two plain egg cups for my toddler (he doesn't like anything other than seasonings added to his eggs!), seasoned with garlic powder, salt, and pepper, and (2) two veggie egg cups with onions and green peppers, seasoned with salt and pepper (pictured at right).  I used a frozen veggie blend in the veggie egg cups, and they took twice as long to cook compared to the plain egg cups (30 minutes vs. 15 minutes).  We had fresh fruit on the side (watermelon!!).  Great, healthy breakfast.  Original recipe for the Vegetable Egg Cups is included below!

Vegetable Egg Cups


Ingredients:


  • Non-stick cooking spray or non-stick baking cups
  • 12 large eggs
  • Sea salt (or Himalayan salt) and ground black pepper, to taste (optional)
  • 1 1/2 to 2 cups chopped veggies
  • 12 Tbsp salsa

Directions:


  1. Heat oven to 375 degrees F. 
  2. Lightly coat a twelve-cup muffin tin with spray or place non-stick backing cups in muffin tin. 
  3. Place eggs in a large bowl; whisk to blend. 
  4. Season with salt and pepper, if desired.
  5. Add veggies; mix well. 
  6. Evenly pour egg mixture into muffin cups. 
  7. Bake for 15 to 20 minutes, or until a toothpick inserted into the center of the cups comes out clean. The tops of the egg cups should be firm to the touch.
  8. Top each egg cup with 1 Tbsp salsa.

Tips and Other Notes:

  • You can experiment with all sorts of veggie and seasoning combinations.  My toddler likes garlic powder added to his; you could also add minced garlic.  Good veggie combinations include: (1) Chopped mushrooms, chopped bell peppers, and chopped onions, (2) Chopped broccoli florets and shredded carrots (3) Chopped red, green, and yellow bell peppers (4) Chopped bell peppers with chopped onions, (5) Spinach and chopped mushrooms.
  • You could saute your veggies before adding them in with the whisked eggs.  
  • Shred the veggies you use to make the veggie egg cups more kid-friendly.
  • To keep this recipe clean, make sure you use a clean salsa!  In our household, we love Mateo's salsa!  Clean and delicious.
  • Store extra egg cups in an airtight container in the fridge for no longer than 4 days. You can also store these individually in the freezer! To thaw, remove from the freezer the night before and store in the refrigerator. Then just pop it in the microwave in the morning until warm.

Below is a video of Autumn Calabrese, author of the FIXATE cookbook, demonstrating how she likes to make her Mini Vegetable Egg Cups.


Have you made Vegetable Egg Cups before?  If so, what's your favorite veggie combination?!?

I would love to hear!

<3 Deise

Sunday, November 8, 2015

Balsamic Chicken


I like to try a new dinner recipe out at least weekly if possible.  I have various go-to clean eating websites that I like to browse, and if all else fails, I do a Google search to see if anything appetizing comes up.  Google never lets me down!  ;)

The winning recipe for tonight's dinner was Balsamic Chicken.  This recipe was so easy to prepare and absolutely delicious - even my toddler loved it!  Of course, that might not be saying much since he likes most clean foods I make....but it was delicious all the same!  We like to eat this over brown rice with a side of veggies.  Enjoy!


Balsamic Chicken


Ingredients:


  • 1 Tbsp 100% extra virgin olive oil
  • 4 boneless skinless chicken breasts 
  • 1/2 tsp sea salt 
  • 1/2 tsp pepper
  • 3 tsp minced garlic (about 6 cloves)
  • 1/4 cup balsamic vinegar 
  • 3/4 cup low sodium chicken broth 
  • 1/4 tsp dried thyme 
  • 1 bay leaf 

Directions:


  1. Coat bottom of non-stick skillet with oil and heat to medium high. 
  2. Add the chicken, season with salt and pepper, and saute until brown on one side.
  3. Flip chicken breasts over.  Add garlic.  
  4. Continue cooking for about 3 minutes while stirring.  Then, add vinegar, chicken broth, thyme, and bay leaf. 
  5. Cover and simmer over medium low heat for 10 minutes, stirring occasionally. 
  6. Remove chicken; set aside and keep warm. 
  7. Continue simmering sauce, uncovered for about 7 minutes. 
  8. Discard bay leaf.  Pour mixture over chicken and serve.

Tips and Other Notes:


Be sure to make extra chicken so you can use some for lunch the next day - either as is for leftovers or on a salad.  This is one of those foods that tastes better the next day, especially after it has been soaking in those juices all night!

Saturday, November 7, 2015

Banana Cinnamon Oatmeal

I LOVE breakfast!  That being said, I wasn't always a breakfast person.  In fact, for most of my life, I skipped that most important meal of the day for one reason or another.  Over the past few years I've gotten better about eating breakfast (slowly but surely!) and now I can't go without it!  Of course, it helps to have a child who needs breakfast, too.  ;)

One of my very favorite breakfast foods is oatmeal.  Before I got into clean eating, I used to buy the Quaker Instant Oatmeal Flavor Variety packs - Maple & Brown Sugar and Peaches & Cream were my favorite flavors!  And let's just say that homemade oatmeal was something I stayed far away from.  Ha!  Not anymore!!  Now the very thought of eating those processed oatmeal packages makes me cringe!

My current favorite oatmeal is a clean version I adapted from a recipe posted by 100 Days of Real Food.  My adapted version of this recipe (see below) makes the perfect amount for my toddler and me, and it's delicious!  This was breakfast for us this morning.


Banana Cinnamon Oatmeal


Ingredients:


  • 3/4 cup whole milk
  • 1/2 cup old-fashioned oats
  • Big dash of cinnamon
  • Small splash 100% pure vanilla extract
  • Drizzle of 100% pure organic maple syrup
  • 1/3 to 1/2 smashed banana (best if it's a little ripe)

Directions:


  1. Melt a smidgen of butter in a small pot so that the oatmeal doesn't stick to the pot as much.  Coat the bottom and lower sides of the pot with the melted butter.  You can use oil instead of butter if you prefer.
  2. Add milk to the small pot; warm over medium heat until the milk starts to bubble.
  3. As soon as the milk starts to bubble, add the oats, stir once, and turn the heat down to medium-low (as low as it can go but still bubble while it cooks).
  4. Add the cinnamon and vanilla and then let the oats simmer for 2-3 minutes.  You can stir it a couple of times if you like.
  5. Once the oats have soaked up most of the milk, add the maple syrup and smashed banana.  Mix everything together and let the oats simmer for a little longer, giving the flavors more time to meld together.
  6. Take off the heat once the oatmeal is the desired consistency and serve or store for later in a thermos.  
  7. Top with sliced bananas and sprinkled cinnamon, if desired.

Tips and Other Notes:


If you like your oatmeal a little "soupy," try to catch it before all the milk has been absorbed by the oats.  Alternatively, you can add a little cold milk to your oatmeal prior to serving; this will help cool it down.  If you add too much milk, cook it a little longer until it gets back to the desired consistency.  If you don't want to eat the other half of the banana you used, you can freeze it for later.

Note that some vanilla extracts have added sugar.  Be sure to use a brand without the added sugar to keep it clean!  Always be sure to check the ingredients list before you buy.

I hope you and your family enjoy this oatmeal recipe as much as my toddler and I do!  You can experiment with oatmeal creations of your own, too.  My sister-in-law has tired both apples and peaches instead of banana.  With the apples, she cooks them a bit before adding them into the oatmeal to soften them up.  The peach recipe she makes tastes more like a dessert!

If you come up with any oatmeal combinations you love, please share them in the comments!!  I'd love to give them a try!